Honda Prelude Forum banner

NSX caliper install

9.6K views 52 replies 18 participants last post by  Andrew  
#1 · (Edited)
NSX front brake install with new rotors.

Parts:
-4th gen VTEC rotors redrilled for 4 x 100 (fastbrakes.com) $100.00
-5th gen caliper bracket (ebay.com seller: nextdayautoparts) ($57.16 for both)
-1990 NSX calipers (ebay.com) $500.00

These are the steps I did and keys I learned when I did this.


Obvious step, remove wheel.


I recommend drilling out the two screws that hold the rotor on at this time. Make sure you drill deep enough because if you don’t you will have to grind any residual material from the hub otherwise the new rotor won’t sit flush. Secondly remove brake line from stock caliper and tie it back out of the way.
Remove stock caliper, two 12mm bolts in the back
Remove stock caliper bracket, two 17mm bolts in the back
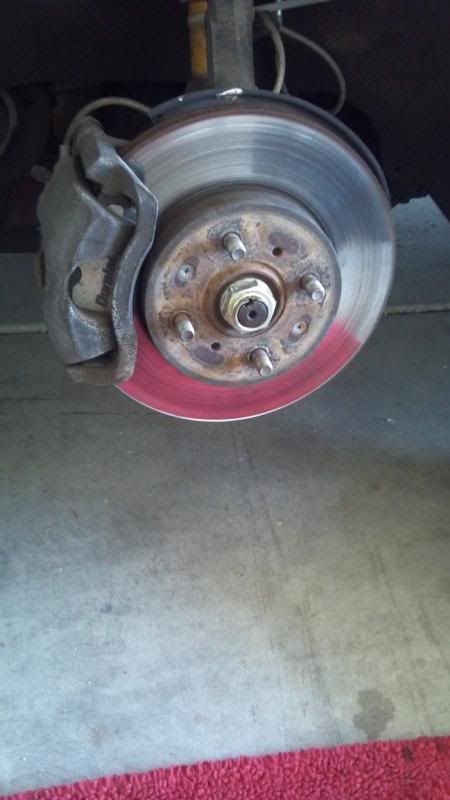
Remove stock rotor, the fronts fell off but the rears I had to PB blast and hammer time.
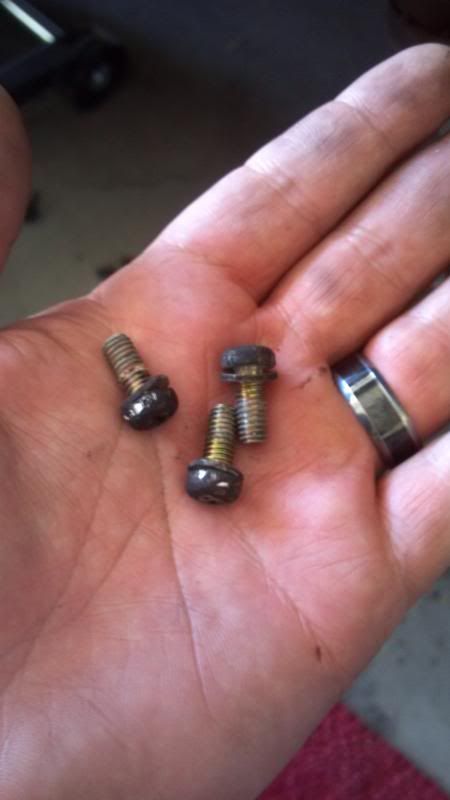
Remove dust shield. To do this there are 3 phillips head screws behind the hub. I didn’t have a special screw driver to take them off so I used a vice grip on the head and loosened them and did the rest with my fingers. To get the dust shield off at the narrow part I used a pair of wire cutters and man handled it. Mostly for lack of proper tools. You can see the holes where the screws were in the picture.
*clean the hub mounting surface well before mounting new rotors. Any rust or junk on that surface is a bad thing. (THX Andrew)


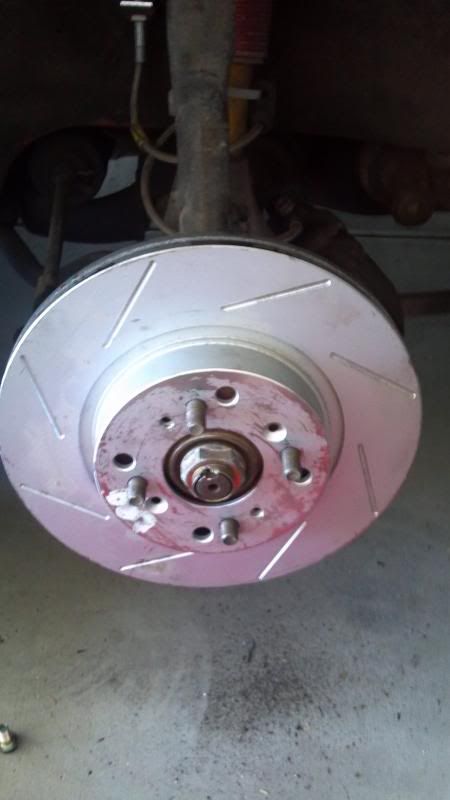
Put on new rotor and hold down with a lug nut.

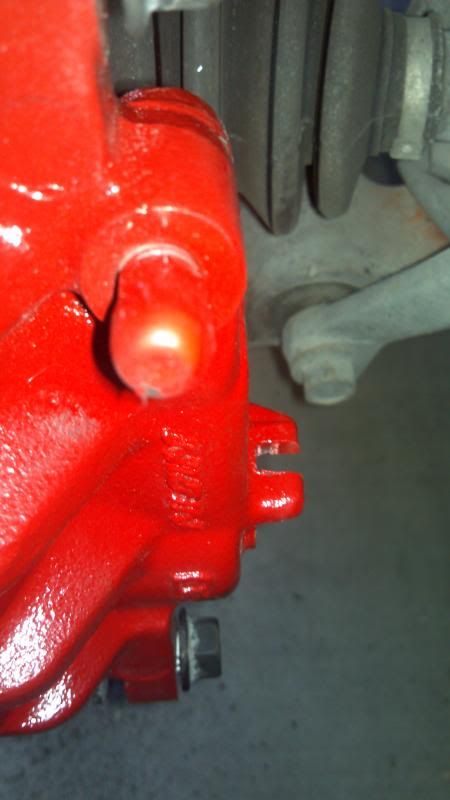
Use 5g prelude caliper bracket (ordered from ebay), mine didn’t come with the plungers but I used the ones from the NSX caliper brackets. The trick to pulling the rubber boot out without tearing it is to separate the plunger from the rubber boot, pull out the plunger and stick a small screw driver inside and pop it out.


Install rubber boot into 5G caliper bracket and then the plunger. Use 3g prelude bolt to bolt the caliper bracket on.


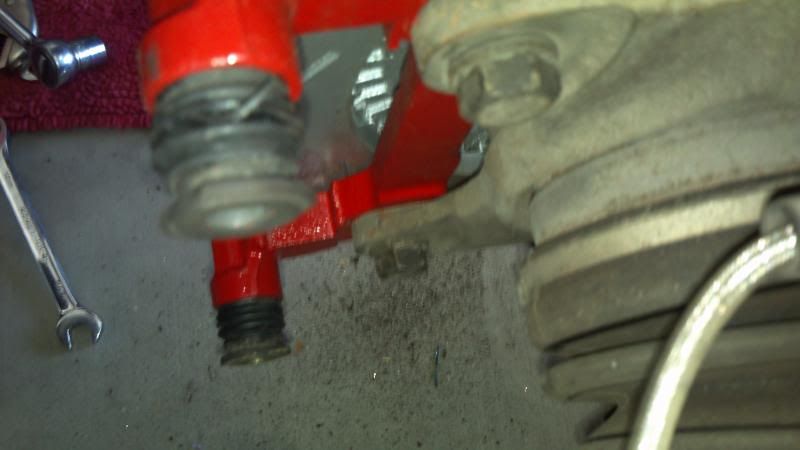
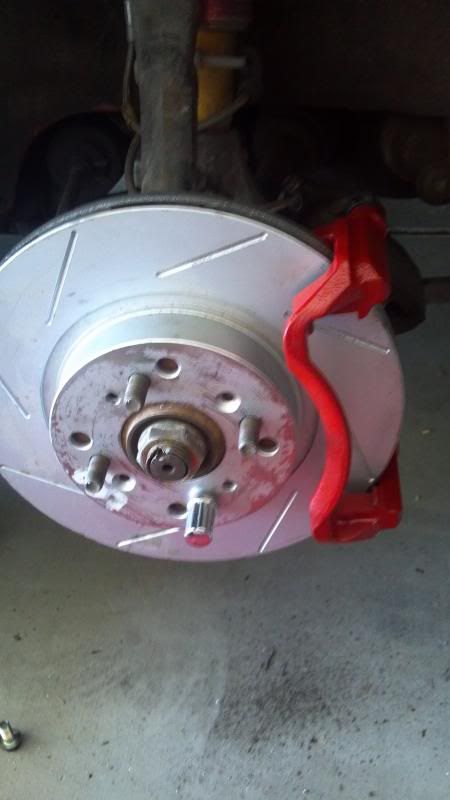
Use NSX caliper bolts to bolt on the caliper.


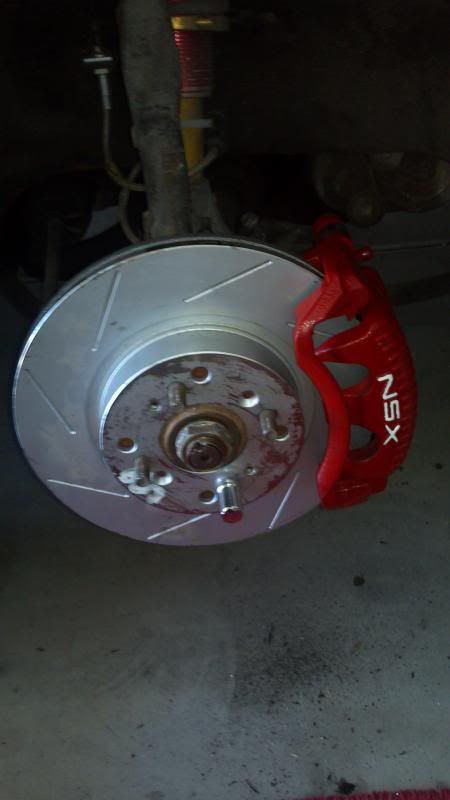
At this point spin the rotor and verify smooth operation. I didn’t have to use spacers to adjust the center line but this doesn’t mean you don’t.
Install brake pads (I used OEM pads)
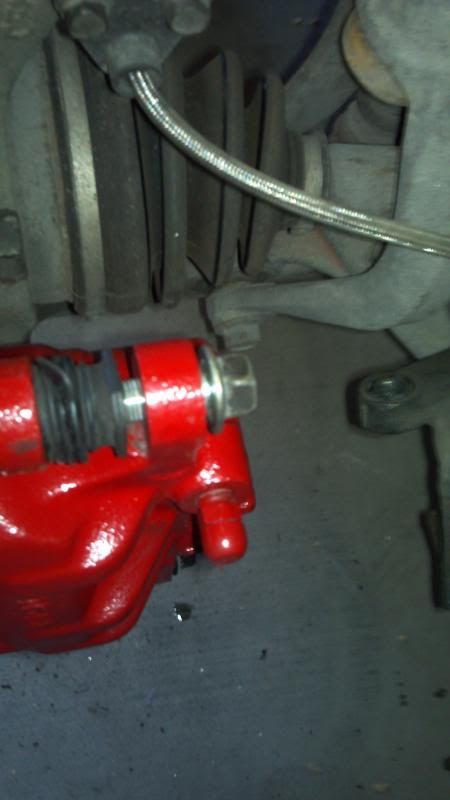
Bolt on brake line and bleed the line.
Put wheel back on and don’t forget to tighten the lug nuts.

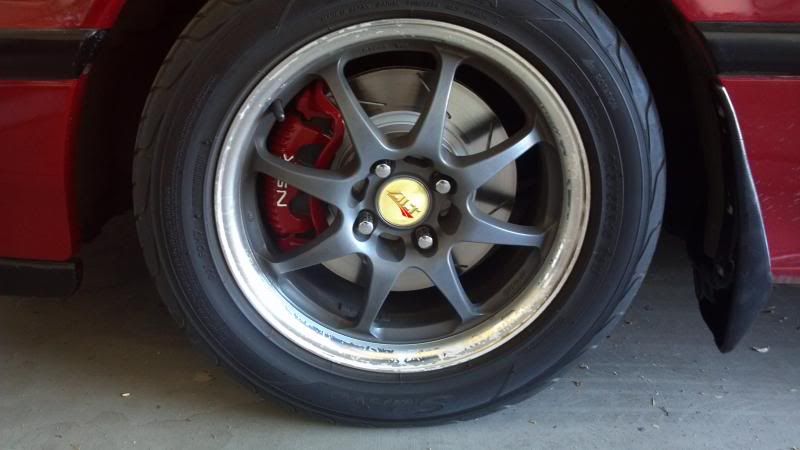
Yes my rims are 15” and this set up fits.


Fastbrakes install at the bottom.
 
#2 ·
Those of you following along close enough will notice these are pictures from the left and right side. I kept forgetting to take pictures as I was working. Also you will notice the stock caliper still attached to the brake line. Lesson learned, take the line off before you remove the caliper, its much easier.
 
#4 ·
Definitely! I was going about 40 and slammed on the brakes. Shit went flying and it stopped like whoa.
 
#6 ·
Nice write up. Some people seem to think brake upgrades are a waste as stock ones can lock up the wheels... but I find the feel is much better, with greater control over the modulation, and less pressure required at the pedal (at the cost of a bit longer throw). Big brakes ftw!!

One step I'd like to suggest adding, always clean the hub mounting surface well before mounting new rotors. Any rust or junk on that surface is a bad thing. I learned that the slow and expensive way.
 
#7 ·
Nice write up. Some people seem to think brake upgrades are a waste as stock ones can lock up the wheels... but I find the feel is much better, with greater control over the modulation, and less pressure required at the pedal (at the cost of a bit longer throw). Big brakes ftw!!

One step I'd like to suggest adding, always clean the hub mounting surface well before mounting new rotors. Any rust or junk on that surface is a bad thing. I learned that the slow and expensive way.
Added.

On my one run the wheels didn't lock up but it could be due to not going very fast or pushing hard on the peddle. I would have a hard time believing any one thought the coolness factor of the OEM is far superior to the NSX calipers! ;)
 
#12 · (Edited)
calipers were 500.00
caliper brackets 57.00
front rotors 100.00
rear kit with rotors 250.00ish


88 SE said:
Curious to see a head-on pic though to see how the calipers line up
The NSX calipers lined up pretty dead center.
 
#11 · (Edited)
It would be a direct bolt on to your 5th gen! :) But mostly a cosmetic upgrade if you already have the vtec brakes.
 
#14 ·
NSX calipers are two-pot.
And obviously it's a Prelude disc, NSX have 5 stud hubs.
 
#16 · (Edited)
1990 - two pot calipers

first post updated with parts list.
 
#22 ·
bro ... can i copy your DIY to my blog..... baikisendiri.com ?
Yes.

I will work on the write up for the fastbrake kit this afternoon. It was plug and play. No cutting involved. I have lots of pictures for that too.
 
#20 ·
Looking at this reminded me of when I first did this and couldn't believe how long ago it really was, I first mentioned it in 2003. But obviously all the 'arguing the facts' stuff happens as the dis-believers chime in lol


Still curious about the spacing though as all the carriers I've used have needed it to be perfectly central.

Anyway it's nice to have a clear/concise write-up for it. :emthup:
 
#23 · (Edited)
Fastbrakes rear kit with OEM calipers

This kit was really easy to install. I did notice the washers that came with the kit needed to be spaced differently from the left side and right side. For example on the left, it was one washer, hub, washer, caliper bracket. The right side didn’t need the washer between the caliper bracket and the mount on the hub. So use common sense.
The pictures are pretty self-explanatory and removal was the same as for the NSX set up. I painted the calipers while still on the car mostly because I didn’t want to bleed them and I don’t have the room to have my car sitting for a few days. I did remove the caliper brackets to be painted.
The NSX parts were painted ahead of time so I removed the rear wheels first and painted those parts, then, I swapped the fronts while the backs was drying. Over all it took about 5 hours to do all four corners. I know it can be done faster but 110* temps require mandatory brakes now and then. Let me know if there are any questions.

Image


At the rear of the car you can see there are 10mm bolts holding the dust shield on, much easier to remove than those stupid Phillips head screws on the front.
Image


Bolts out.
Image


Again at the thinnest part of the dust shield I used a wire cutters and man handled it out of there.
Image


These rings come with the kit. The beveled edge goes towards the hub, slowly push it on spinning the hub as you go. It’s a really tight fit so make sure you clean the surface first and don’t be too aggressive with it. I tried to get pictures of the bevel but it’s so slight my phone wouldn’t pick it up.
Image

Image

Image


These are the parts you will need. This would be one set. The lock tight goes on the black bolts which hold on the aluminum bracket. I chose not to use lock tight on the bolts that hold the caliper bracket to the fastbrakes aluminum bracket.
Image


The bolt together just like this.
Image


Clearer picture.
Image


This is how I had to space the washers on the left rear.
Image


Again this is how I had to space the back left.
Image

Image


Put the rotor on and hold in place with a lug nut.
Image


Finished look.
Image
 
#26 ·
I bought the vtec rotors from fastbrakes already redrilled for 4x100.
 
#29 ·
#31 ·
I hate to kinda thread jack here, but I know for the fast brakes rear, you use the stock calipers. I was wondering, are there any factory calipers that fit other than the stock ones on the rear? I need to replace mine, preferably for the BBK, and I don't want to spend 100 dollars each for calipers.

Sent from AutoGuide.com Free App
 
#32 ·
Yes, look at threads related with my name.
I've mentioned it many times.
ITR calipers are probably the only ones easily available over there.
Then use a suitable 260mm disc.

If they weren't so heavy to ship I could supply them.
 
#33 ·
We've gone through this before :p.

I know ITR calipers fit, however, it's impossible to find them. Or very hard. And they cost a lot. I'm talking about just stock Civic rear calipers. Or maybe Accord calipers. I mean, the bracket should be the only difference, I would think. All Hondas have the same bolt pattern for calipers and caliper brackets, right?

Also, I can't rear every thread with your name in it. I tried. PP would only show me a portion of them. Trust me man, I've searched and searched. I keep finding the same threads on the subject.

Sent from AutoGuide.com Free App
 
#34 ·
We've gone through this before :p.
I know :lol:

I'm talking about just stock Civic rear calipers. Or maybe Accord calipers. I mean, the bracket should be the only difference, I would think. All Hondas have the same bolt pattern for calipers and caliper brackets, right?
In that case.....
No, not all H calipers are the same fitment.
The rears don't actually have carriers/brackets.
They can differ in offset as well which can prevent them fitting unless a suitable disc is used.
Also the hankbrake cable bracket is often different so making the cable fit can be awkward.

So you actually want a caliper to fit as stock with the stock sizing?
Can you not find a brake supplier over there that does remanufactured calipers? They are often reasonably priced (over here at least).
 
#35 ·
Oh yeah, you're right. I forgot that the rears don't have brackets, generally it's 90+ dollars in American monies for one rear caliper. Which, I suppose ain't bad, but fronts are like, 30 or 40 dollars per. Then I gotta spend 300 bucks on a Fast Brakes kit on top of that. Most of my brake budget will be going into the rears! I figured I could find a rebuilt Civic caliper for cheaper. However, like you said, that probably won't work due to the bracket being different.

Not existing I mean, sorry.

Sent from AutoGuide.com Free App