

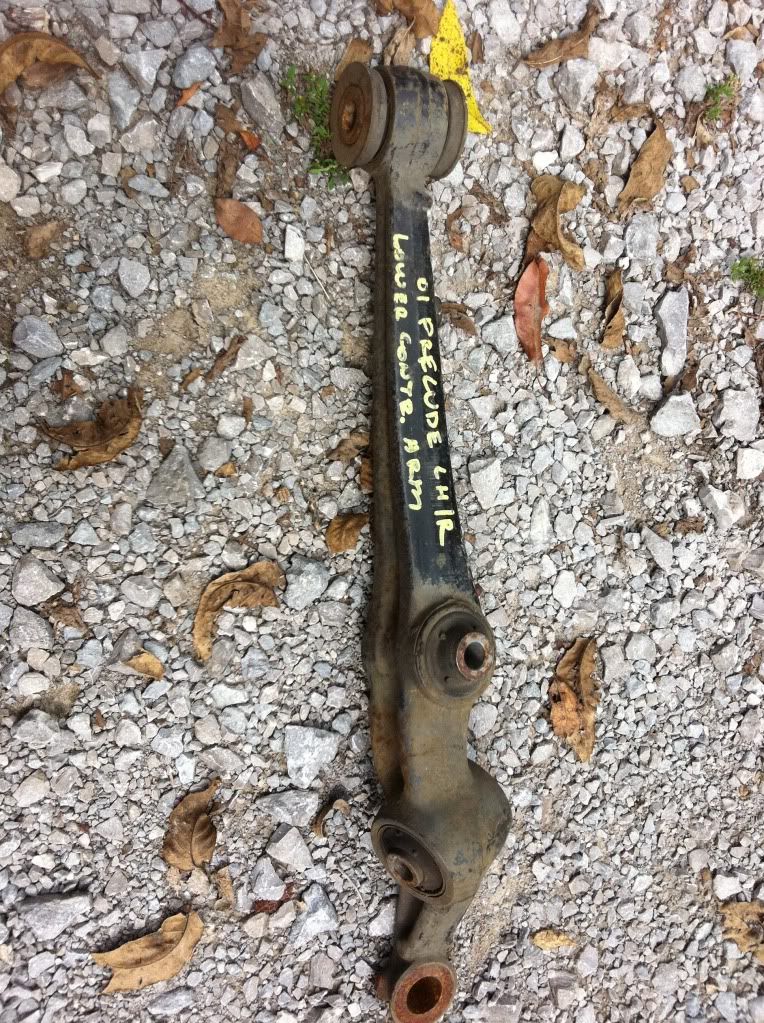
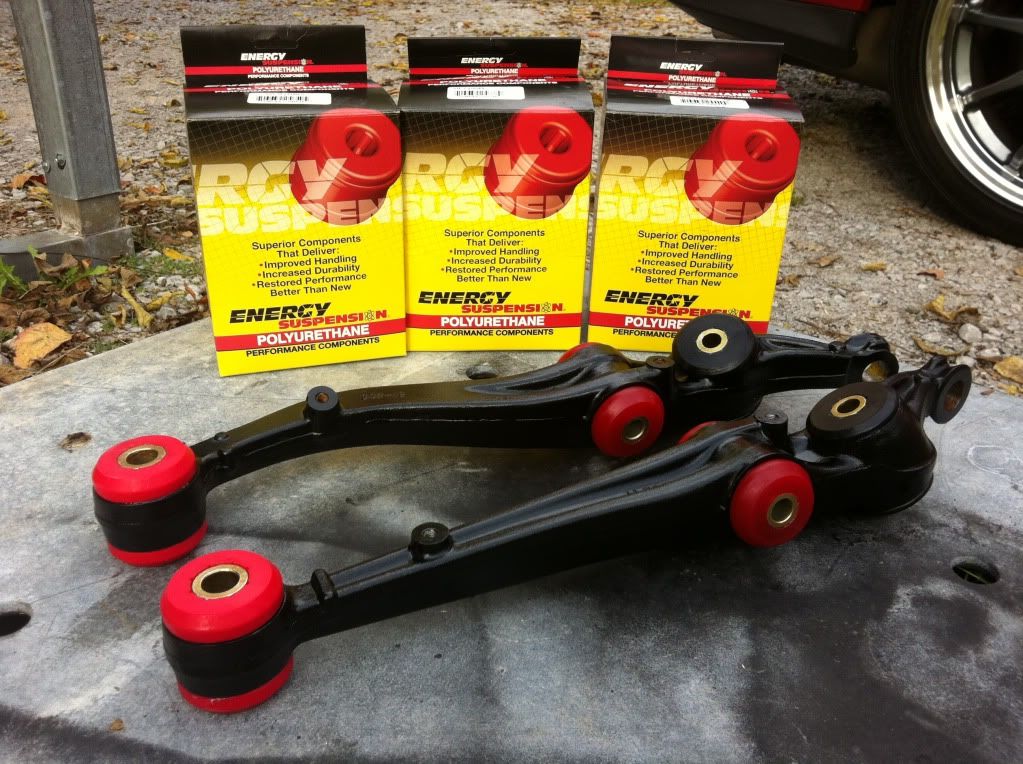
I decided to upgrade the rear bushings in my 98 base to Polyurethane bushings. I cruised through several threads and realized there was no solid description on how to do this without either a hydrolic press or going to a shop and having it done. There were threads with quick descriptions but no pics. I might not have searched thoroughly enough or it might be unnecessary but here goes:
I used a limited and inexpensive selection of tools that anyone could easily own. Also, I did this outside in my gravel drive, no garage or power required. I used: a hacksaw, a hammer, a cold chisel, propane plumbers torch, penatrating oil, a small vice, and a 3/8" drive extension. The vice is possibly unnecessary and the extension could be substituted by large needlenose pliers. The hacksaw could be substituted with a reciprocating saw but more damage could be done to the control arm.
I have been pulling alot of overtime at work lately and knew I wouldn't be able to do this all at once. I ordered a set of used lca's off ebay so my DD wouldn't be sitting while this was going on. I did most of this in 1/2 - 1 1/2 hour bites before I went to work. I'm not sure of the total time due to my stop-and-go but it could be done in an afternoon, I'm sure.
,
![Image]()
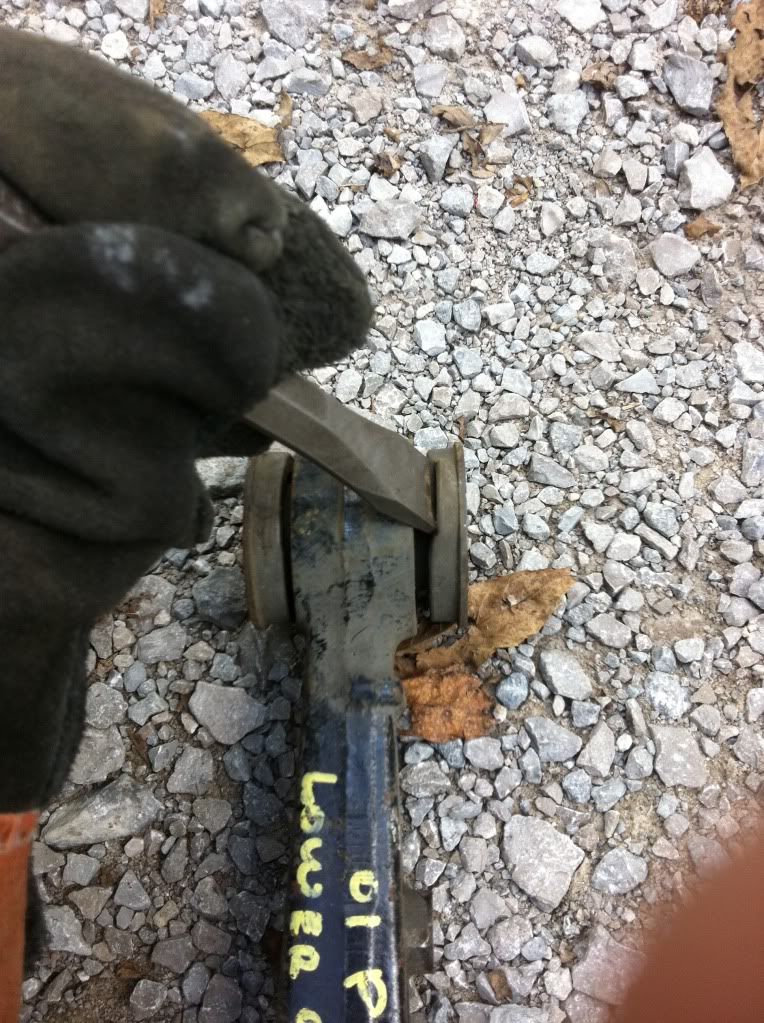
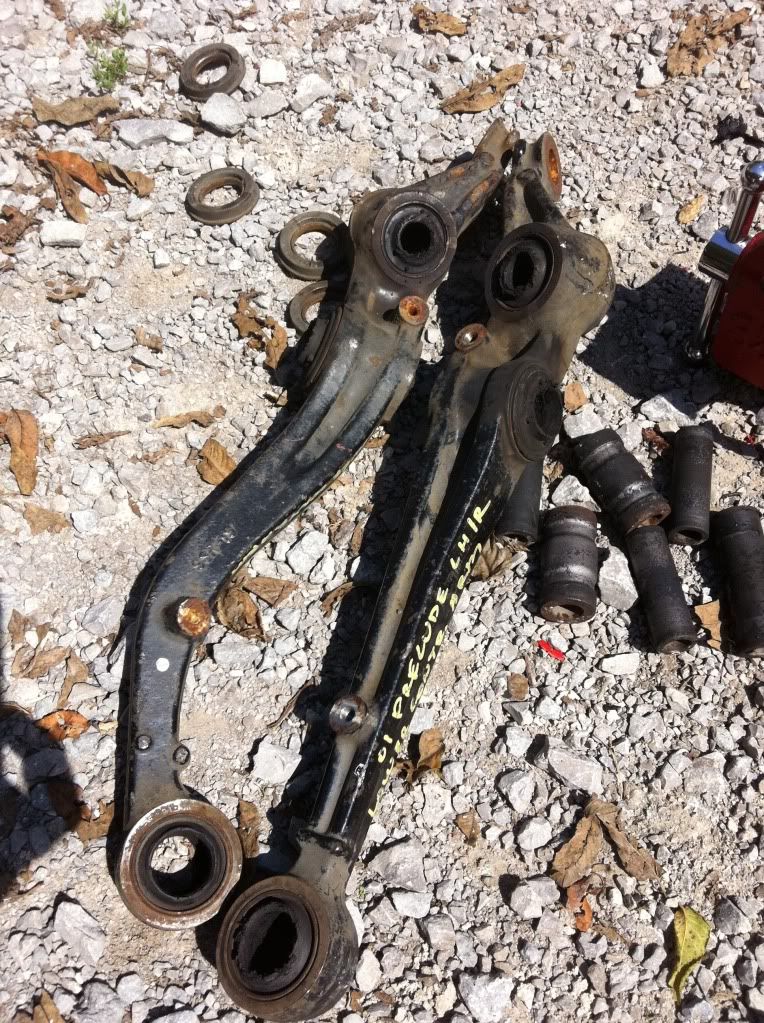
First, use the chisel to drive the ends off the inboard bushings. Penetrating oil might help here, but I didn't need any.
![Image]()
![Image]()
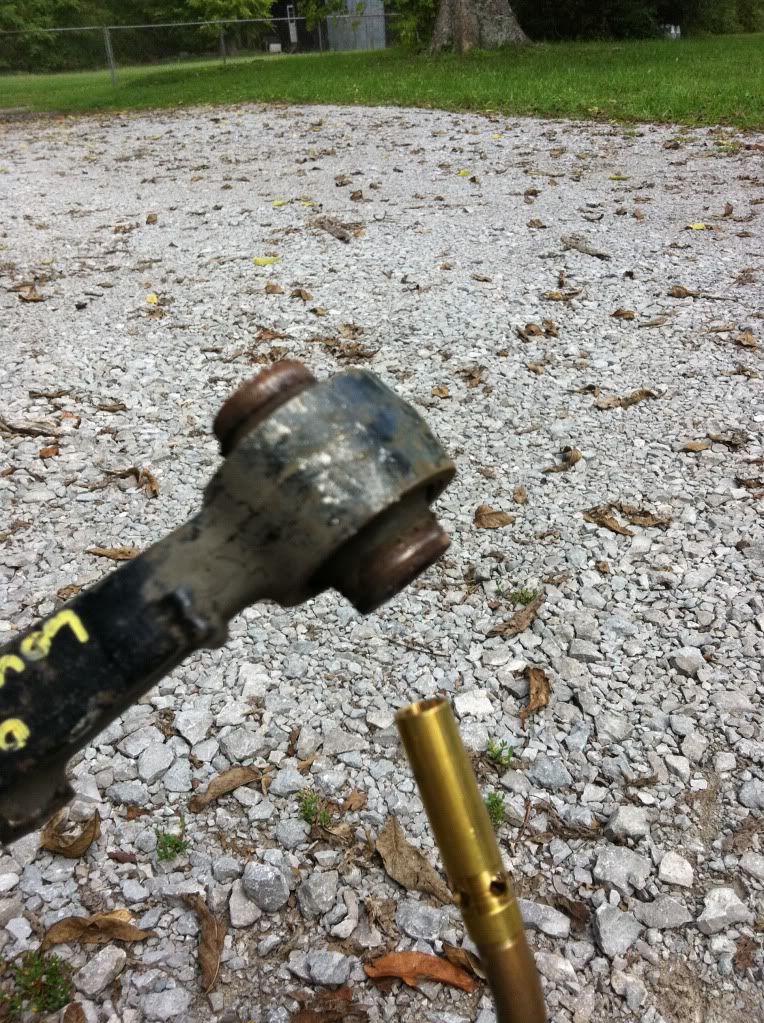
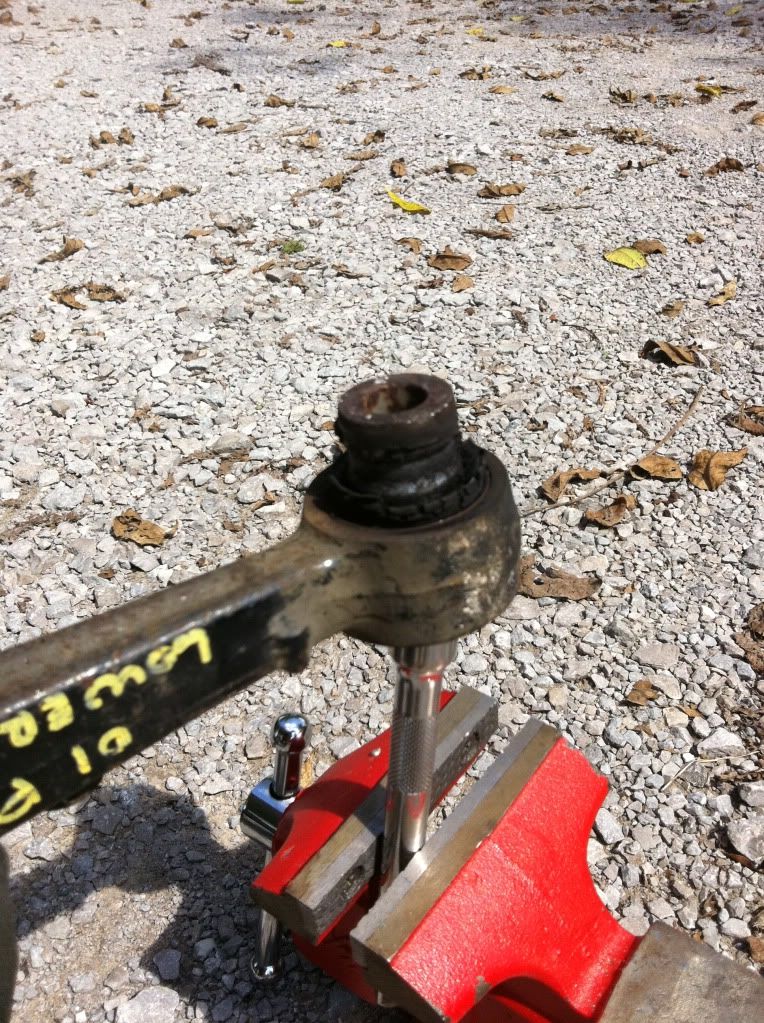
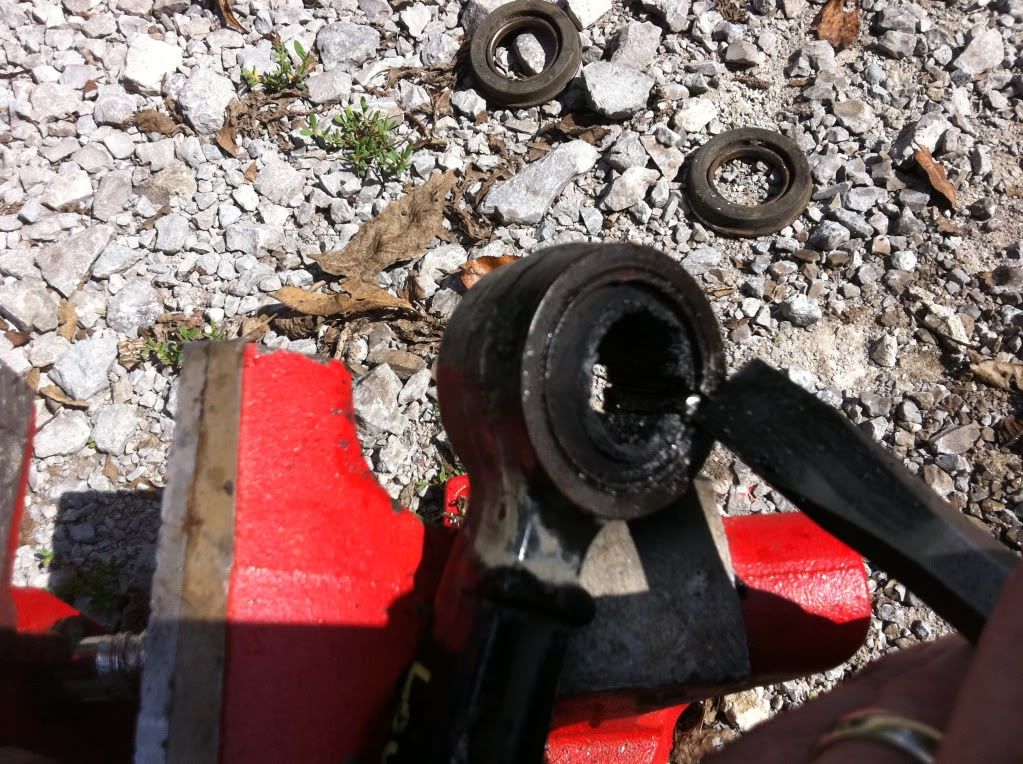
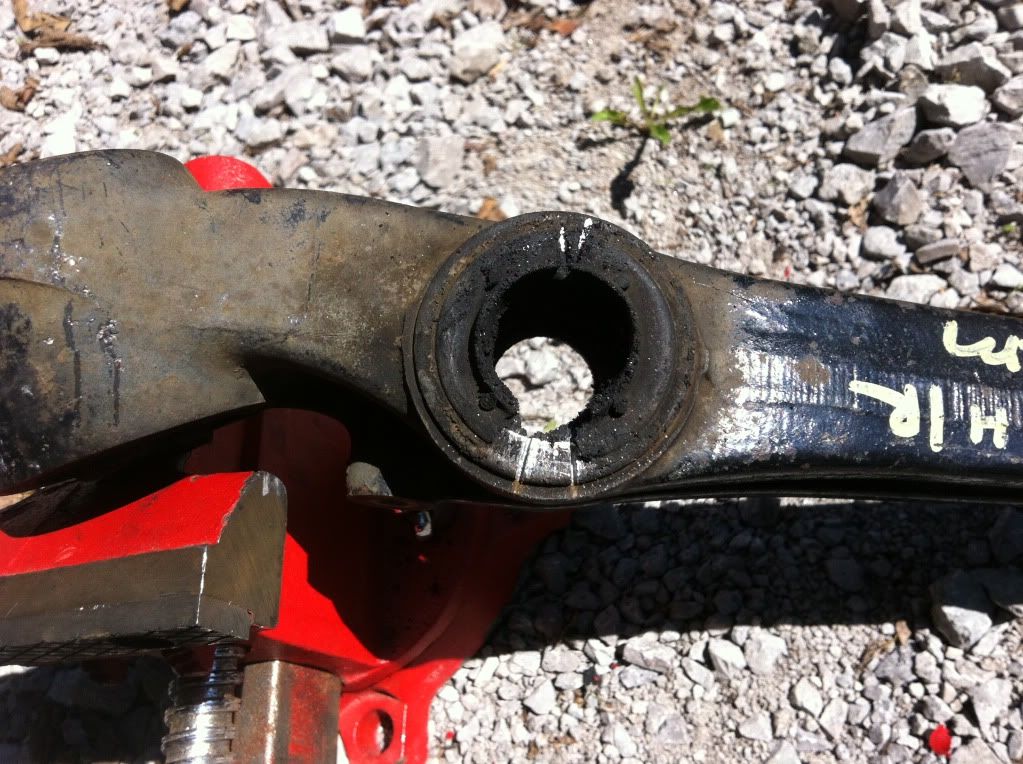
Next, light your torch and let the flame pass through the inside of the center metal sleeve. The object here is not to burn the rubber away but to heat the sleeve to the point that the rubber around it can't hold it any longer. Turning it over when the rubber begins to burn will help keep the smoke to a minimum.
![Image]()
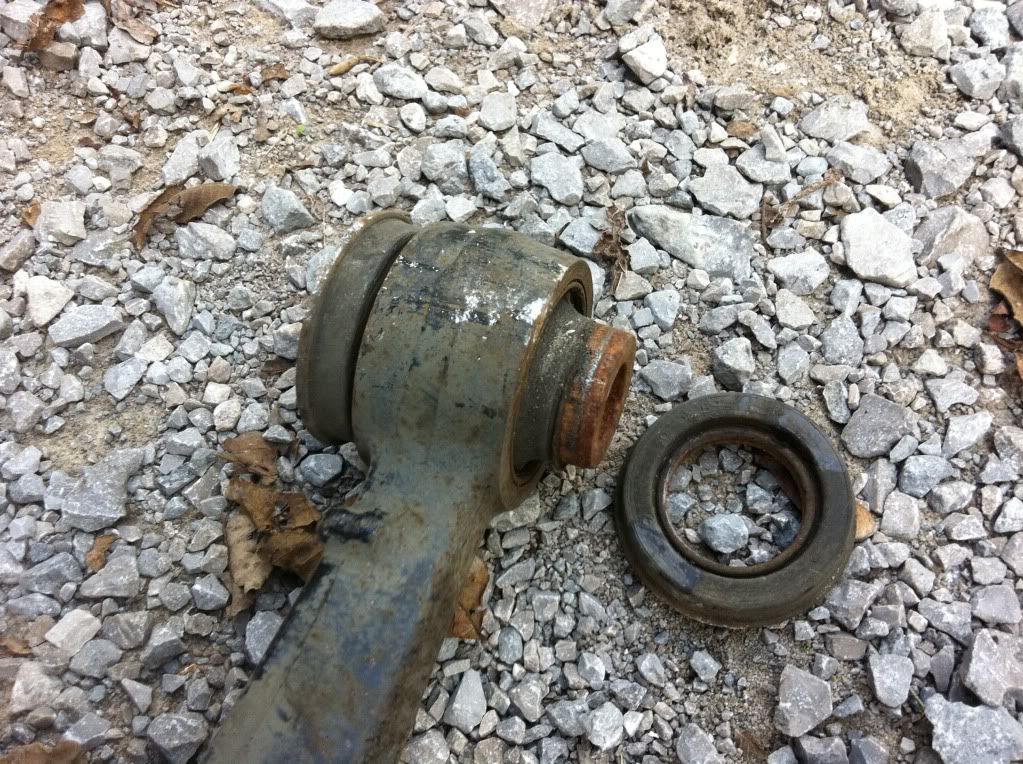
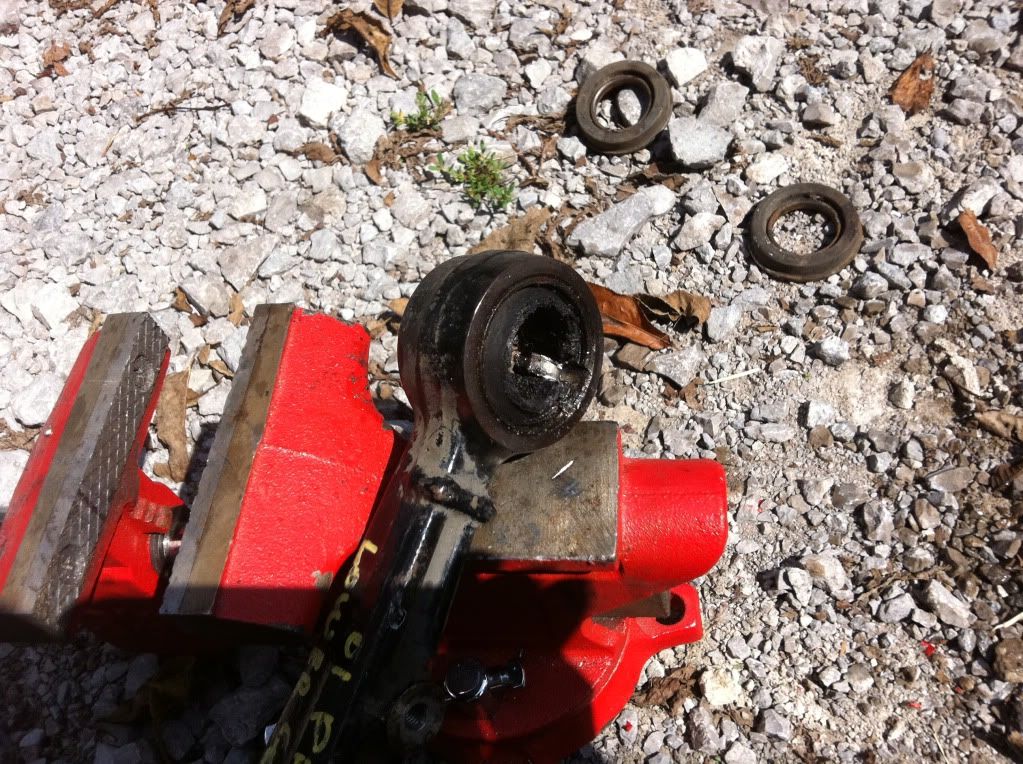
When the sleeve is hot enough, it will slide right out. I used the vice and extension here but you could grip the sleeve with needlenose pliers and pull it out.
![Image]()
Lather, rinse, repeat....
![Image]()
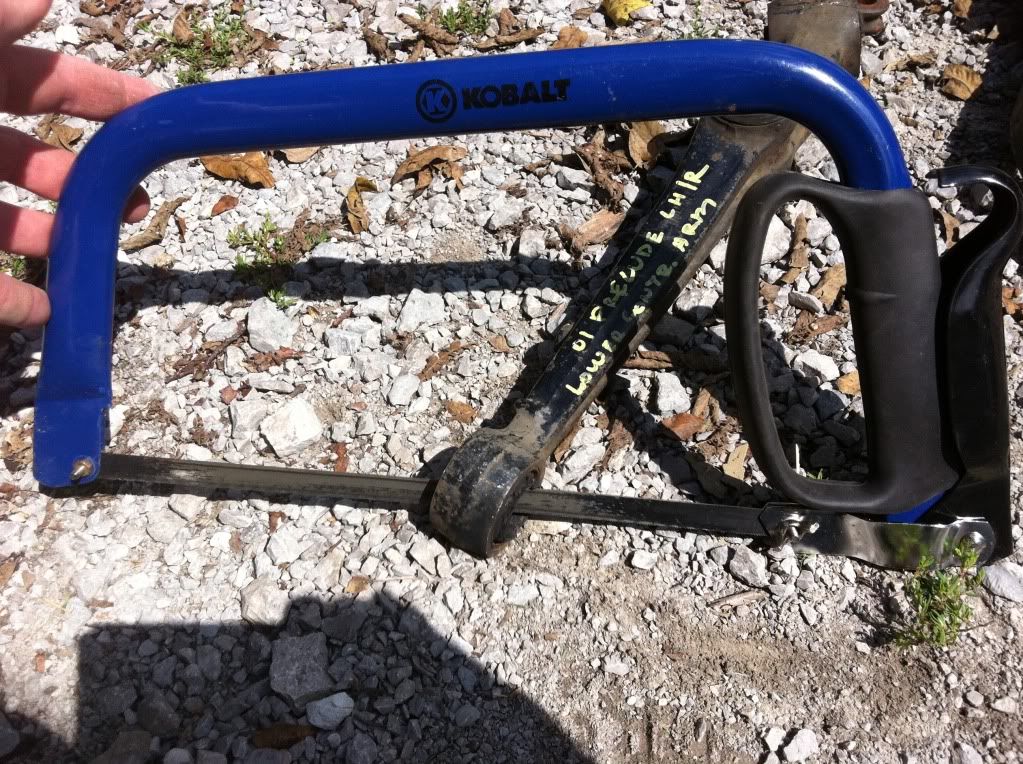
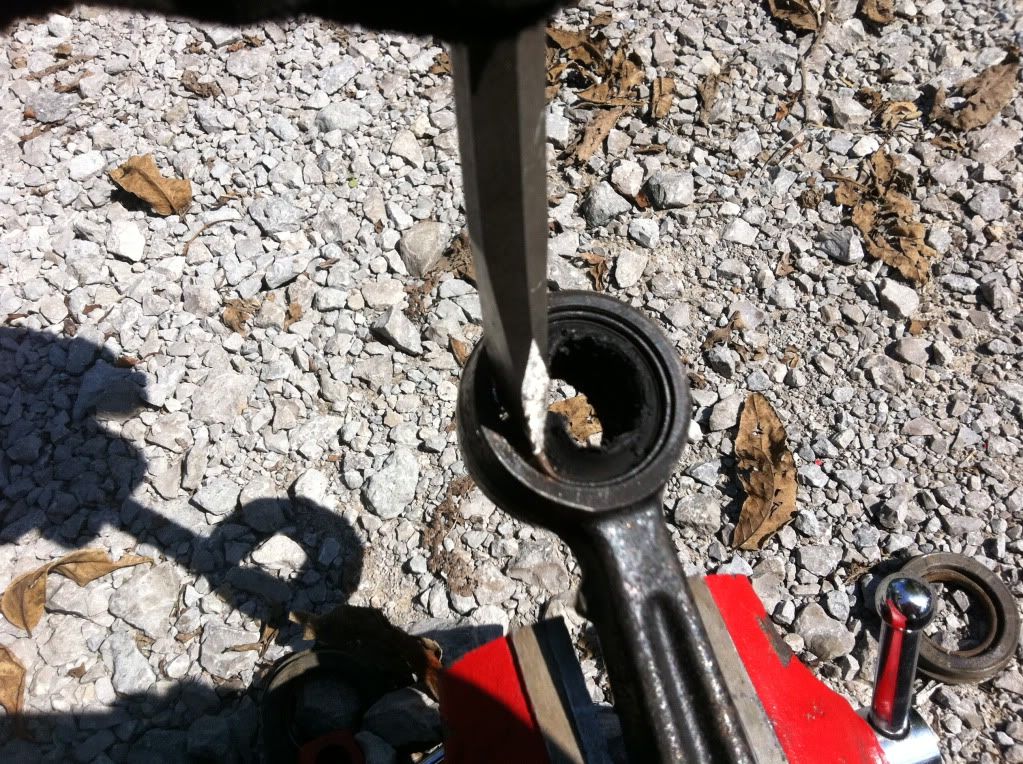
Disassemble your hacksaw and put it back together with the blade through whats left of the bushing.
![Image]()
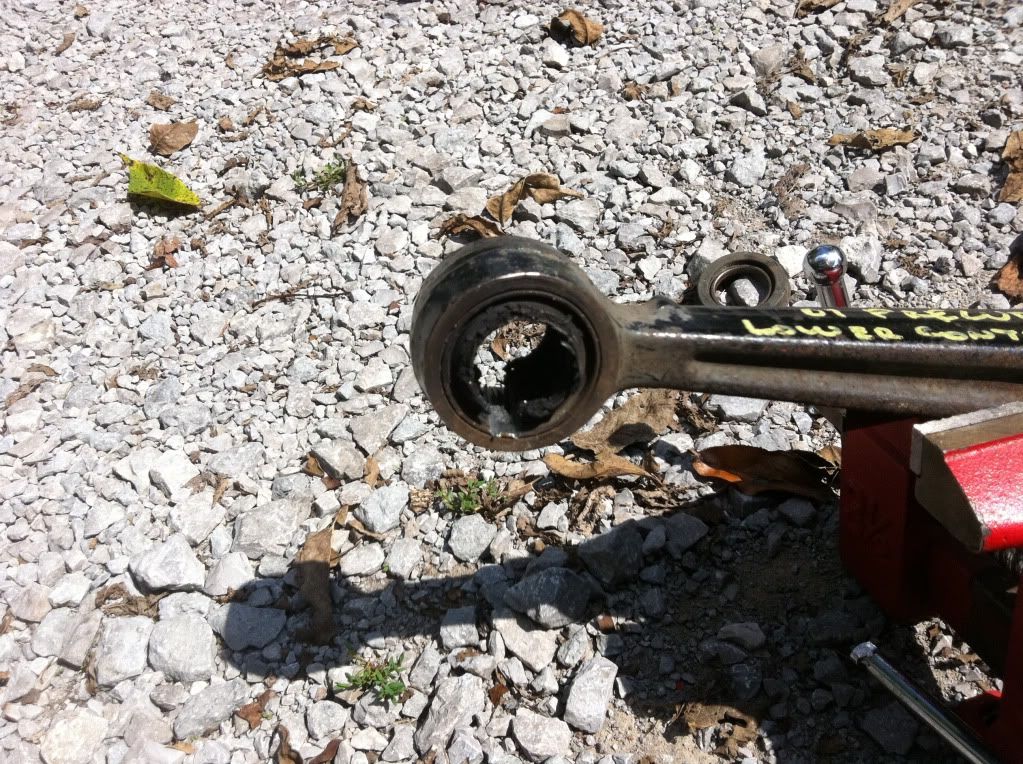
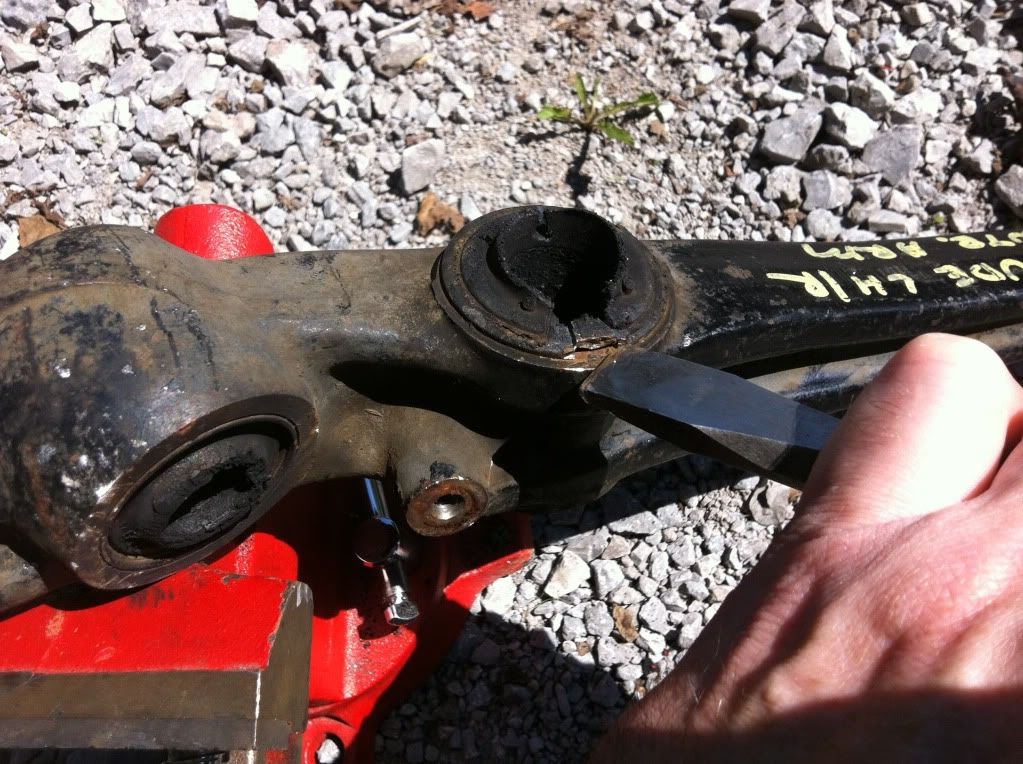
You now need to cut two parallel grooves through the outer sleeve of the bushing without cutting into the control arm. You can work at it with the saw and get the rubber out of the way where you intend to make your cuts. You need to cut slowly and smoothly to insure an even cut all the way across. If it is cut unevenly, you will cut into the control arm. After your cuts are made remove the saw and inspect your cuts. You will most likely have to go back, possibly from the other direction, and cut a little more. Not being cut completely through but cut very, very thin is actually the best.
![Image]()
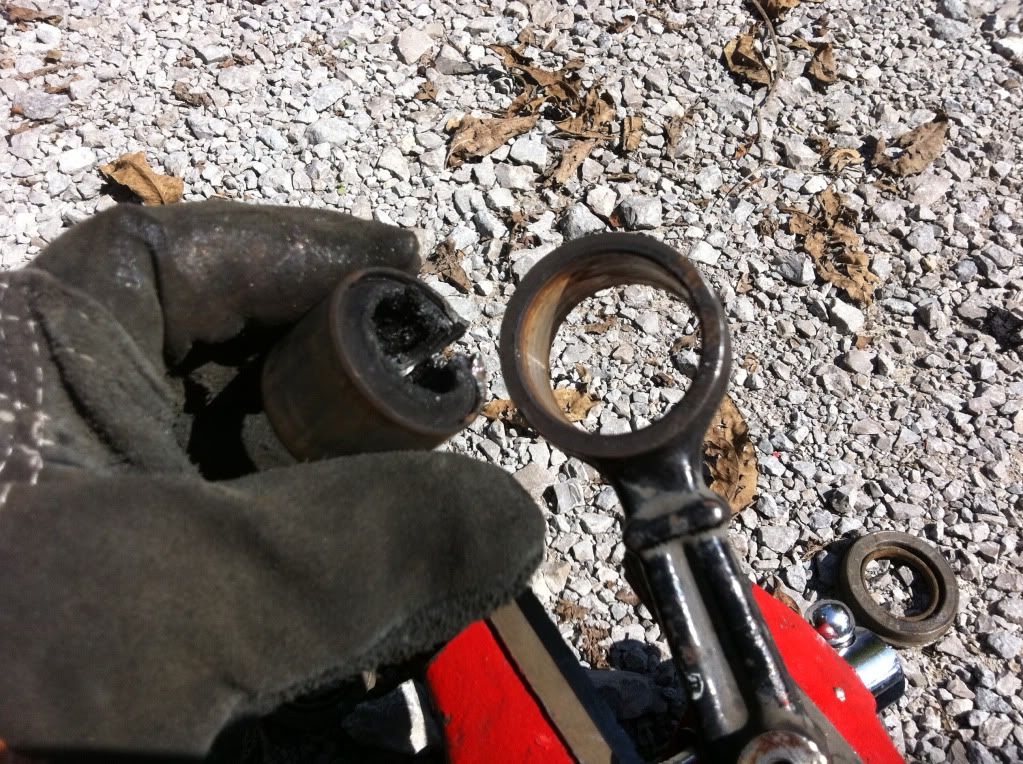
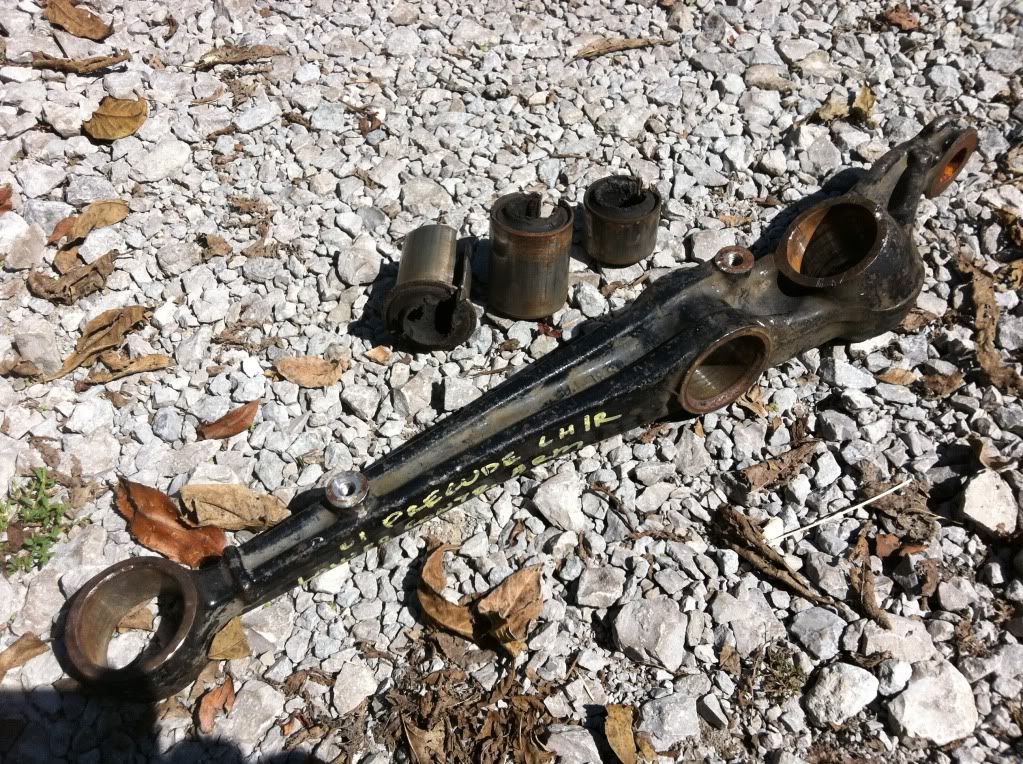
After your cuts are satisfactory, take the cold chisel and remove the piece between the cuts. As you go a little penetrating oil around the edges and into the area where you are removing the strip will help. You may need to work the cut strip from both sides, but the outer sleeve of the bushing will start sliding out before the strip is completely removed. A little chiseling on the cut sleeve can help too.
![Image]()
![Image]()
![Image]()
![Image]()
The bushing for the trailing arm has a lip on the outside of the arm. Cut your grooves on the inside then make cuts across the outside of the lip that line up with your grooves on the inside.
![Image]()
![Image]()
After you get them all out, if you cut into the control arm with the saw, you will need to smooth out the damage as I imagine this would cause premature wear on polyurethane bushings. Sand paper, a round file, or a rotary tool will be necessary. Now your ready for the installation of your new bushings.
![Image]()
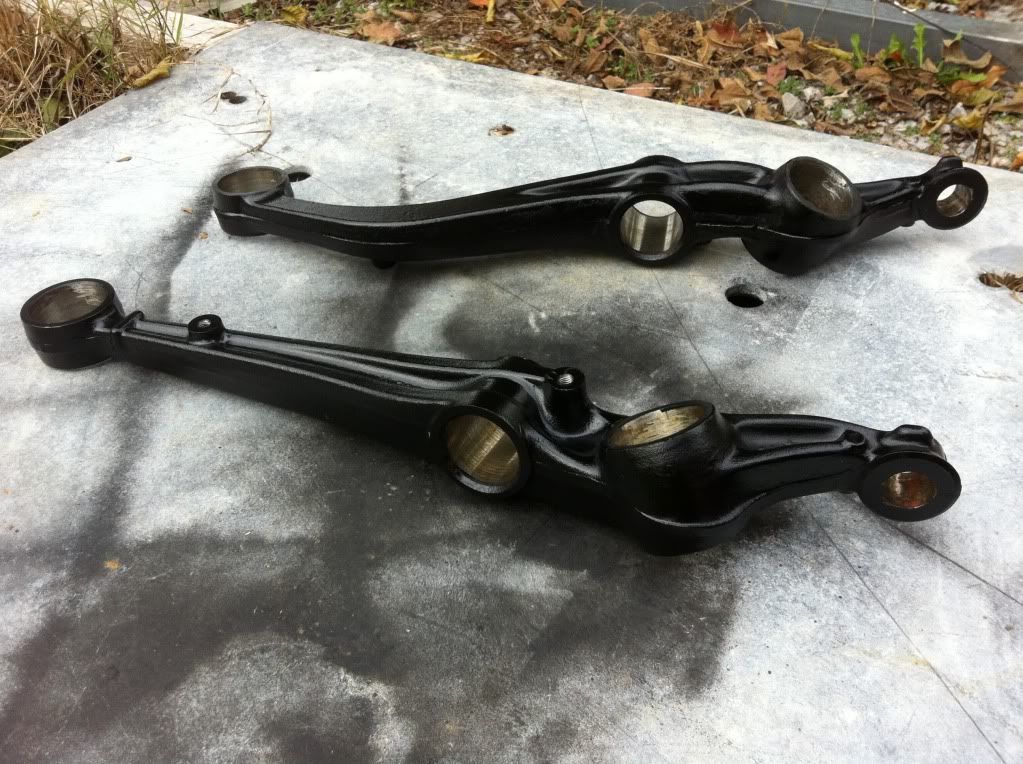
I stripped and painted my lca's, but smoothing and powder coating would be awesome if you didn't need to get the parts back on the car right away.
![Image]()
![Image]()
I used a limited and inexpensive selection of tools that anyone could easily own. Also, I did this outside in my gravel drive, no garage or power required. I used: a hacksaw, a hammer, a cold chisel, propane plumbers torch, penatrating oil, a small vice, and a 3/8" drive extension. The vice is possibly unnecessary and the extension could be substituted by large needlenose pliers. The hacksaw could be substituted with a reciprocating saw but more damage could be done to the control arm.
I have been pulling alot of overtime at work lately and knew I wouldn't be able to do this all at once. I ordered a set of used lca's off ebay so my DD wouldn't be sitting while this was going on. I did most of this in 1/2 - 1 1/2 hour bites before I went to work. I'm not sure of the total time due to my stop-and-go but it could be done in an afternoon, I'm sure.
,
First, use the chisel to drive the ends off the inboard bushings. Penetrating oil might help here, but I didn't need any.
Next, light your torch and let the flame pass through the inside of the center metal sleeve. The object here is not to burn the rubber away but to heat the sleeve to the point that the rubber around it can't hold it any longer. Turning it over when the rubber begins to burn will help keep the smoke to a minimum.
When the sleeve is hot enough, it will slide right out. I used the vice and extension here but you could grip the sleeve with needlenose pliers and pull it out.
Lather, rinse, repeat....
Disassemble your hacksaw and put it back together with the blade through whats left of the bushing.
You now need to cut two parallel grooves through the outer sleeve of the bushing without cutting into the control arm. You can work at it with the saw and get the rubber out of the way where you intend to make your cuts. You need to cut slowly and smoothly to insure an even cut all the way across. If it is cut unevenly, you will cut into the control arm. After your cuts are made remove the saw and inspect your cuts. You will most likely have to go back, possibly from the other direction, and cut a little more. Not being cut completely through but cut very, very thin is actually the best.
After your cuts are satisfactory, take the cold chisel and remove the piece between the cuts. As you go a little penetrating oil around the edges and into the area where you are removing the strip will help. You may need to work the cut strip from both sides, but the outer sleeve of the bushing will start sliding out before the strip is completely removed. A little chiseling on the cut sleeve can help too.
The bushing for the trailing arm has a lip on the outside of the arm. Cut your grooves on the inside then make cuts across the outside of the lip that line up with your grooves on the inside.
After you get them all out, if you cut into the control arm with the saw, you will need to smooth out the damage as I imagine this would cause premature wear on polyurethane bushings. Sand paper, a round file, or a rotary tool will be necessary. Now your ready for the installation of your new bushings.
I stripped and painted my lca's, but smoothing and powder coating would be awesome if you didn't need to get the parts back on the car right away.
")


